
To give a new look to the windows of your vehicle, there is nothing more effortless than getting them tinted. Car window tinting Dubai is a perfect option to customize your ride and make it more appealing in appearance. It offers many different benefits like reducing sunlight while adding extra privacy inside your car. While exploring the best tinted glass for cars, you may see a lot of options. Among them, you can choose the dyed or carbon tint. But for a more practical option, you can select ceramic or metalized tints.
For people who are on a budget, they can save money by installing these tinting films on their own. To have your car look fresh in no time, read this guide and install the tinting film perfectly on windows.
Step-By-Step Guide To Quickly Install Window Tinting Film On Your Vehicle
 Doing car window tinting at home on your ride can be daunting when you are not skilled enough or haven’t installed it before. As a result, you will make bubbles and streaks on the surface of windows. If you want to lower the energy cost by preventing air conditioning needs, we have prepared this comprehensive guide for you to install the window tint film like a pro.
1. Required Tools
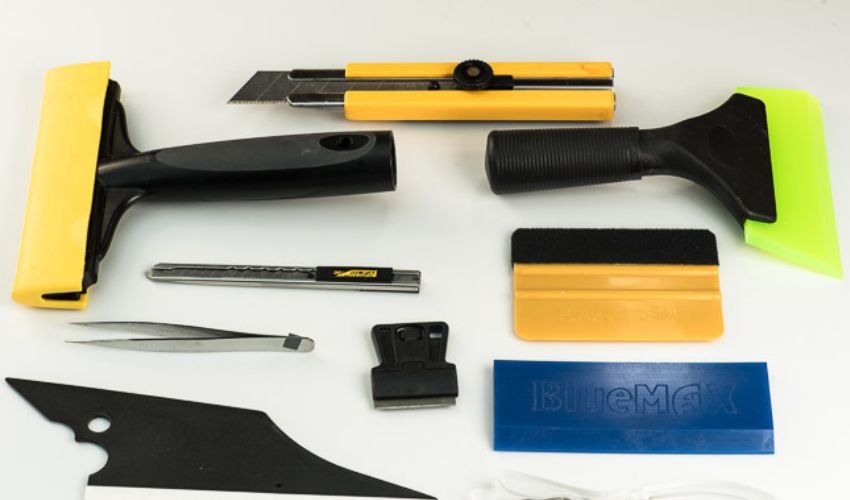 The very first step is to gather everything you need to finish the job. Besides the tinting film, you’ll need the following:
- A Small Plastic Spatula
- A Utility Knife
- A Razor Blade
- Soapy Solution
- Applicator Bottle
- A Squeegee
- Masking Gun
2. Remove Any Existing Window Tint
 If your vehicle already has a tinting film installed on the windows, remove it carefully with the help of a razor blade. You can remove the existing window tint from the car with the help of steam cleaning, using a hair dryer or a heat gun. Besides that, using a newspaper and soap with a water mixture also helps to remove the tint from the windows. Using the steamer is the quicker option as it will loosen the film and you can peel it away easily.
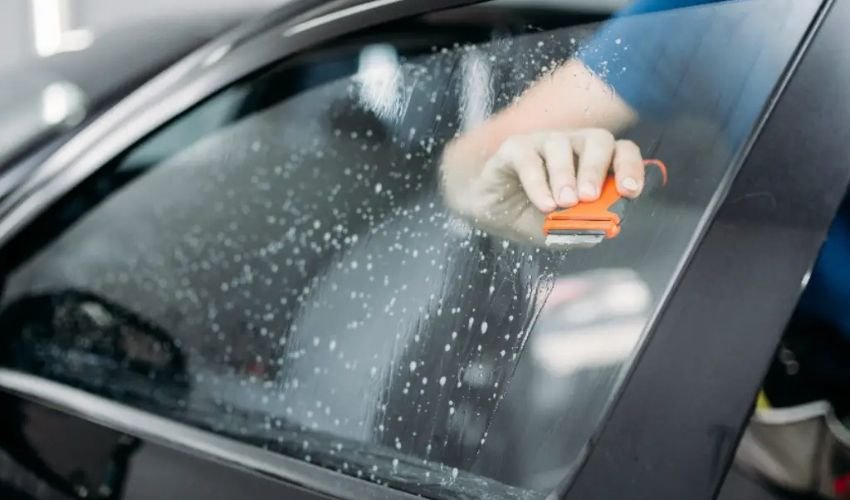
- Remove Residue & Clean The Window
Before applying new window tint film, ensure the surface is free from dust, marks, residue, or greasy materials. To help with this, you can use the damped cloth followed by the squeegee and wipe down the surface thoroughly.
Use an alcohol-based cleaner for cleaning the window and make sure it is totally free of contaminants. This will allow the new tint film to adhere in a most effective way on a lint-free surface.
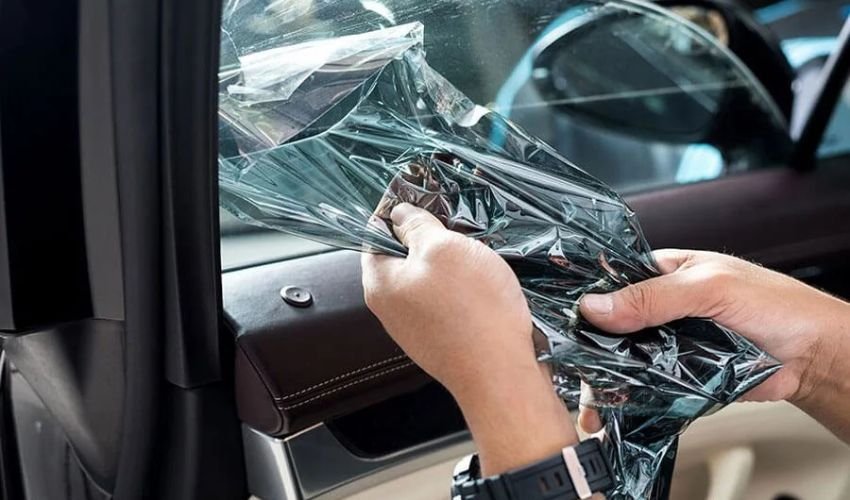
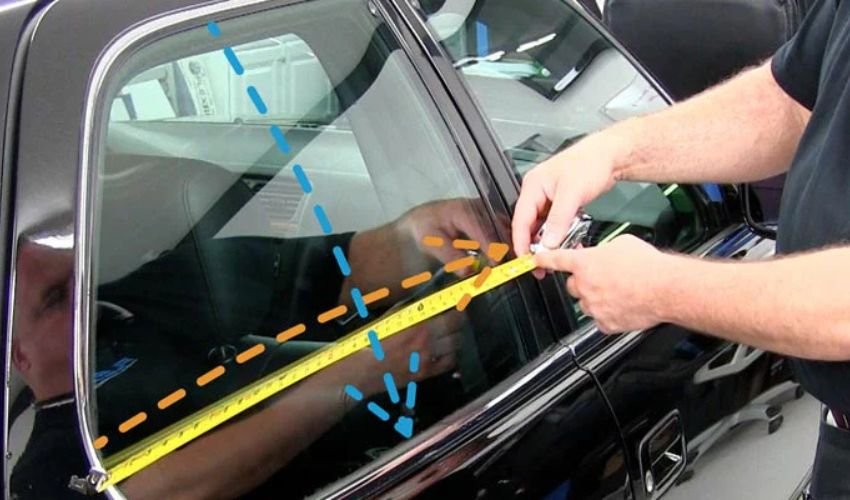
- Measure, Prepare, & Cut The Film To Size
Now that you have cleaned the windows, it’s time to measure and cut the window film precisely. Choose the best quality films like 3M car window tint. You can use cardboard to cut the template. In this way, you will get the exact-sized window film that will fit the window size without trimming and wasting the excessive part.
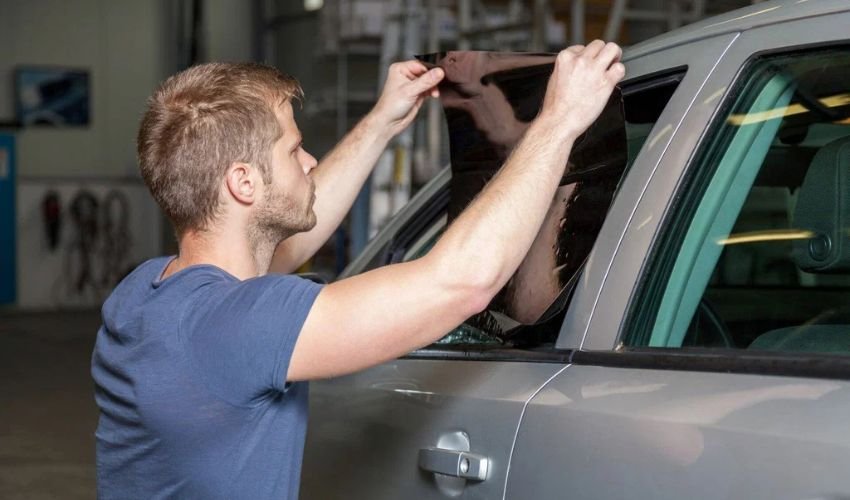
5. Apply The Film
 Before applying the film to the windows, spray the soapy solution over the surface and let it be like that for a few minutes. In this way, tint film won’t get any bubbles that may appear during the application process.
Spray a light mist of water on both surfaces and remove one side of the backing to make sure the film will stick to the window properly. Now, with care, apply the tint film. Pay close attention to detail while doing this.
6. Give Finish to Window Tint Film
 After applying the tint over the window, any excess film can be taken out using a razor blade or any sharp knife. You can give some finishing touch to the film after the working process is completely over.
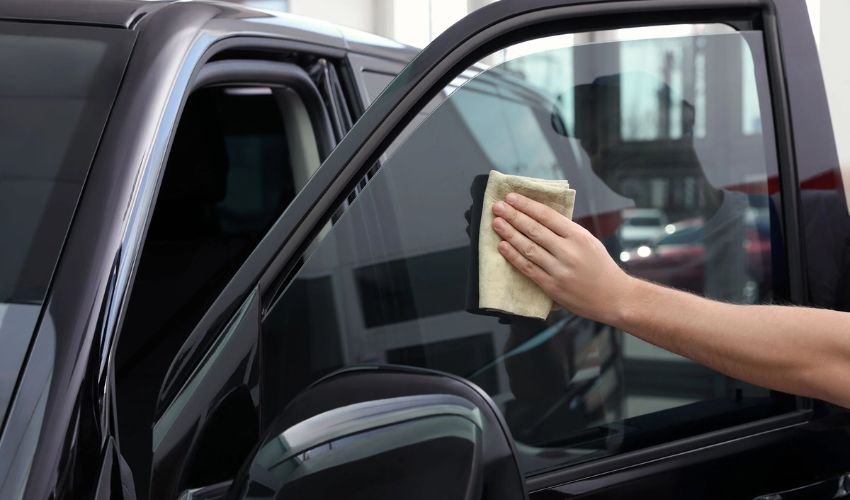
Clean off the smudges of your hands with a clean microfiber cloth or paper towel. Do not use your hands harshly; be as gentle as possible so that you will not scratch your newly applied tint.
Understanding Auto Window Tint Laws in the UAE
 While getting your car windows tinted, you need to be careful of RTA car window tinting rules in the UAE. You can’t just have any film of your choice. There is a legal window tint percentage that must be followed. Violating these rules can cause heavy window tint penalties. For side windows, it is a maximum of 50 percent. That means, at least half of VLT (Visual Light Transmission) must pass through your tinted glass. Moreover, you can’t tint your windshield at all, except for a small strip of a few centimeters on the top.
If you don’t follow these regulations, you can face a hefty window tint fine of up to AED 1500. And if caught multiple times going against these rules, your vehicle can be impounded as well.
Conclusion
Tinting your car has become crucial in the UAE for both looks and functionality. It not only reduces the glare or protects your car upholstery but also offers shattered glass protection. Installation of car window tinting film becomes easy when you have the right supplies and know the basics.


